
Printing Trim Marks
Trim marks indicate where to cut or align plates in multi-color printing. These marks are added to the four corners and center edges of the finished dimensions. Understanding trim marks is essential for creating most printed materials.
1. Purpose of Trim Marks
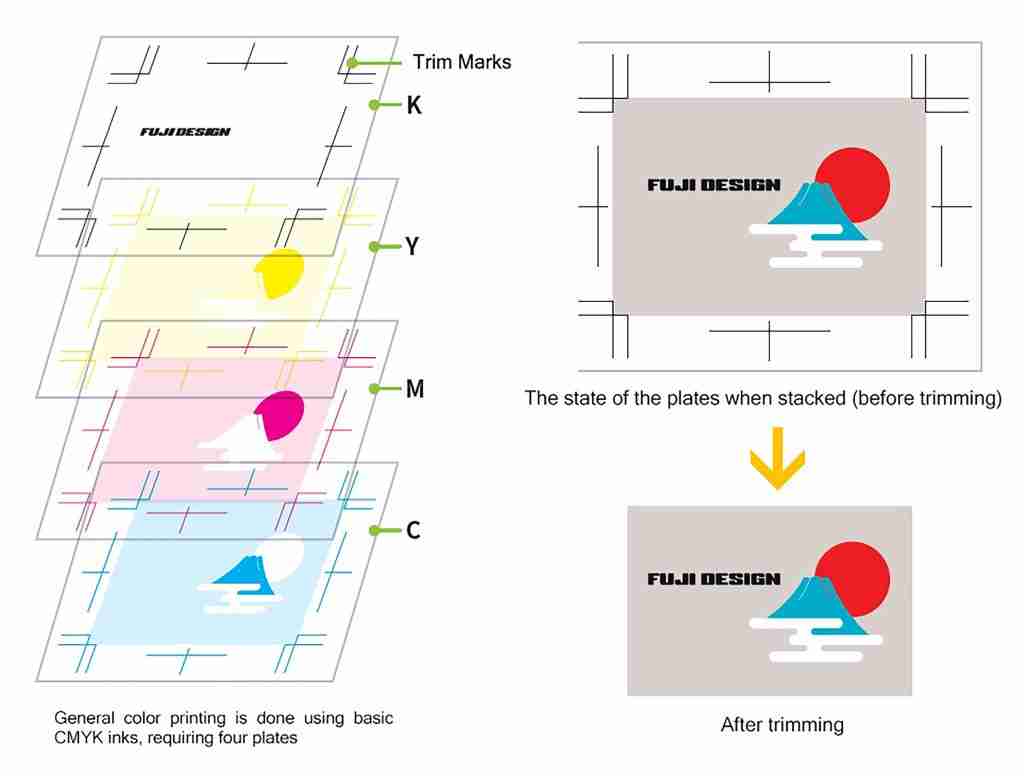
Printed materials are typically produced on large sheets of paper and then trimmed to the desired size. Trim marks indicate where the cuts should be made. Additionally, when aligning multiple plates during the printing process, shared marks are used to ensure alignment. Trim marks serve both purposes and are also referred to as “cutting marks.”
2. Differences Between American and Japanese Trim Marks
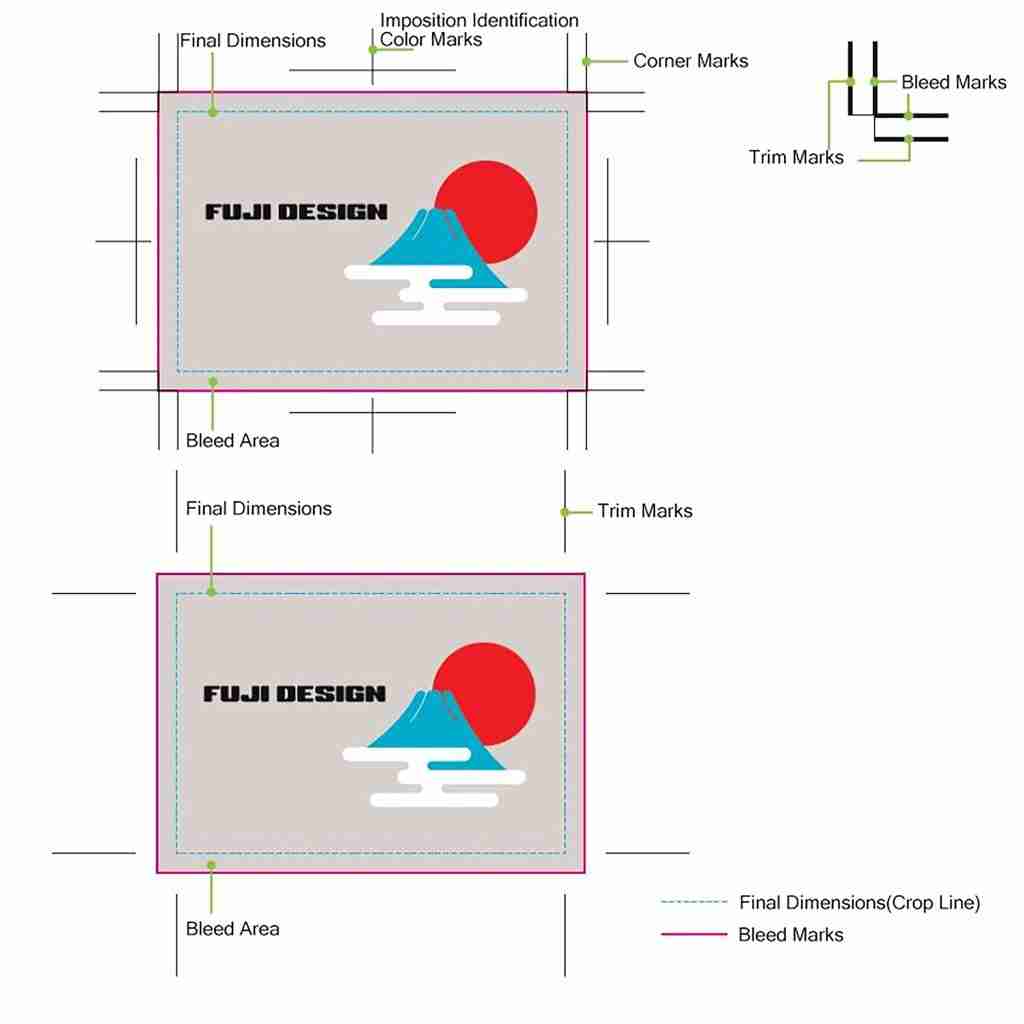
- American Trim Marks: These only indicate the finished dimensions, and the trim marks show the cutting positions directly.
- Japanese Trim Marks: Also known as double-line trim marks, they consist of trim marks and bleed marks. The rectangle formed by the trim marks represents the finished dimensions, while bleed marks indicate the bleed area.
3. Types of Trim Marks
Trim marks can be categorized into corner marks, imposition color marks, fold line marks, and more. Software like Illustrator provides options for creating trim mark objects.
- Corner Marks: These define the finished dimensions and are used in both American and Japanese trim marks.
- Imposition Color Marks: Exclusive to Japanese trim marks, these are used to align the center of the finished dimensions and can sometimes serve as a basis for placing or cutting marks.
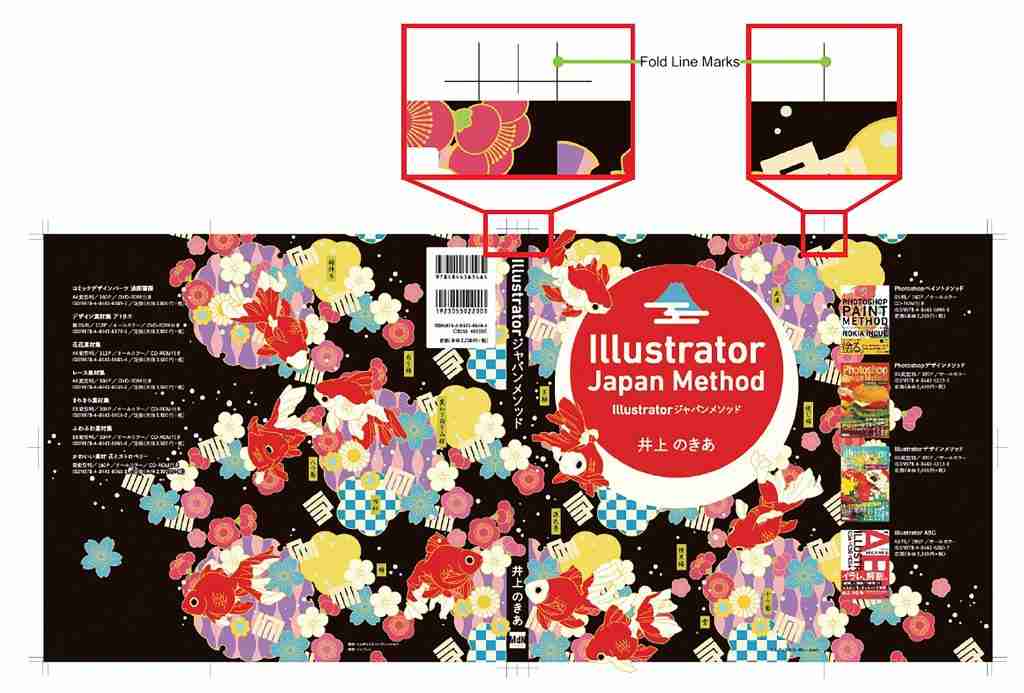
- Fold Line Marks: These indicate folding positions. For example, when designing book covers, fold line marks are used to specify the positions for the spine and flaps.