
Bleed Area in Print Design
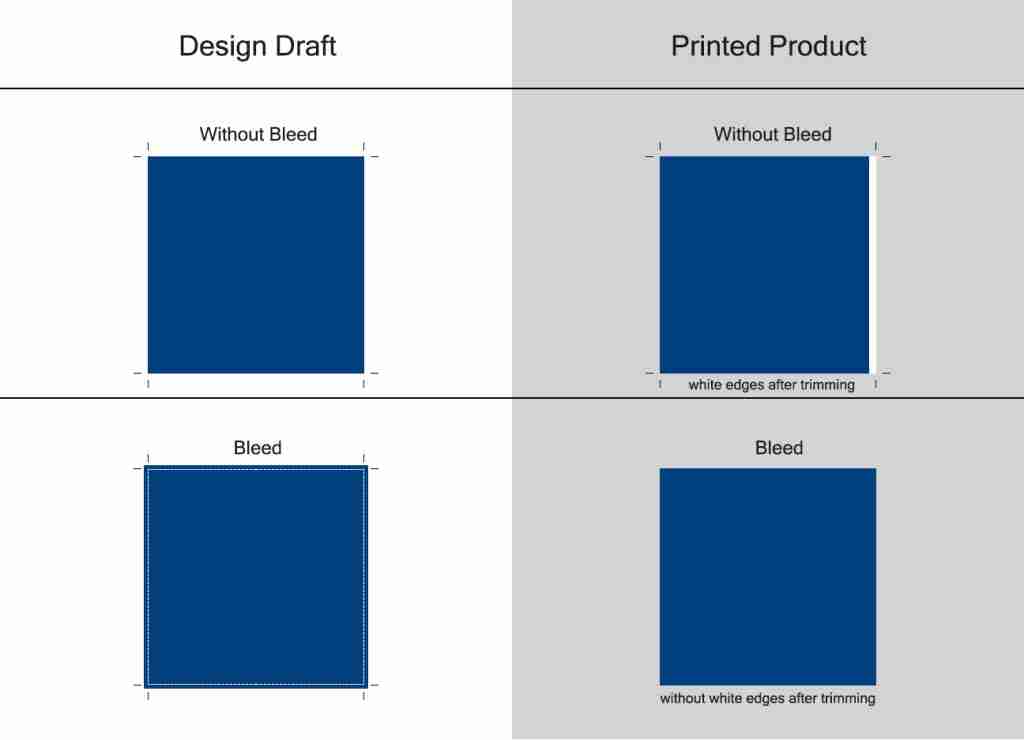
Printed materials must be trimmed after printing to achieve the final product. However, trimming can involve minor inaccuracies. To avoid cutting off important content or leaving white edges due to these errors, designers add an extra margin/background around the final design. This safety margin is called the bleed area.
What is a Bleed Area?
The bleed area refers to the additional space beyond the final dimensions of a printed product. Its primary purpose is to prevent imperfections in the finished product caused by trimming inaccuracies, ensuring the design remains complete and visually appealing.
Bleed areas are usually set to 3mm (approximately 0.125 inches) and must be configured before starting the design process. If a printing company discovers a file without a bleed area, they will typically request revisions to ensure that the finished product matches the intended size, content, and design.
Why Add a Bleed Area?
When producing an A4-sized print, the design is not printed directly onto an A4 sheet. Instead, it is printed on a larger sheet of paper, which is then trimmed down. Printing and trimming are handled by machines, and slight misalignments can occur if the paper stack is uneven or the machine isn’t perfectly aligned. Printing on larger sheets allows room for such adjustments during trimming.
This is especially important for smaller printed products, where even a few millimeters of misalignment can significantly impact the overall appearance. To maintain the integrity of the printed design, adding a bleed area is essential.
Without a bleed area, the finished product may have visible white edges or lose portions of the design along the edges. Therefore, regardless of the type of printed material, including a bleed area is a must before printing.
Bleed Area Dimensions
The standard bleed size for printed materials is typically 3mm (approximately 0.125 inches) on all sides of the design. For example:
- The standard US business card size is 3.5″ x 2″.
- With a 3mm (0.125-inch) bleed, the total size becomes 3.75″ x 2.25″ (3.5 + 0.125 + 0.125, 2 + 0.125 + 0.125).
After setting up the bleed area, extend the background color or image to fill the bleed dimensions. This ensures that, even with minor trimming errors, no white edges will appear on the final product.